Back in July (right around the time that my business partner broke up with me), I made a drastic change: I decided to finally take action on something I'd always wanted to do but had never prioritized. I decided to write romance novellas. And since I began writing those books, I've had a lot of questions about what my writing process is like! So I wanted to share my romance novel writing process with you today.
But first, a little background...
Why the interest in writing books?
Writing books has basically been my dream since I was a little kid. Some of my earliest memories are of me scribbling away on bits of paper. I liked imagining stories, building worlds, and creating characters. I spent huge amounts of my free time as a child and a teenager writing novels, in fact.
But as I grew older, I figured that it wasn't a viable career option. I knew it took a huge amount of time to find and sign on with an agent, and from there to find a publisher willing to take you on, and from there go through all the writing and rewriting and editing and publication of your books.
Simply put, I needed a career where I could actually get started with earning an income fairly early on. At the same time, I was also starting to get more interested in writing about real-life (non-fiction) topics.
Enter freelance writing 🙂
(Like seriously. If you want to make it on your own and get started fairly quickly, freelancing is a fantastic way to do it. It's much faster and more lucrative in the beginning than creating products! If you're interested in freelancing, I recommend you start here.)
While I built my freelance business, I had it in the back of my mind that I still wanted to write books. I figured that I would do it on the side and start with writing business books, since that's my jam. And so I wrote The Business of Writing & Editing: Practical Tips & Templates for New Freelancers and published it right before I got super into being a course creator. Granted, the timing wasn't quite right. I had just published my book and then I shifted gears and began teaching new freelancers how to build their own successful and profitable businesses (by the way, teaching has been awesome, and I love it!)—so I didn't give my book as big of a launch as it deserved.
Then, when my business partner Dan and I joined forces to start a podcast, I wanted to write a book about the podcast. So I did! I spent hours upon hours writing A Year in the Life of Candid Conversations: How to Create a Podcast From Scratch. But the timing, again, wasn't quite ideal: the day that I published that e-book was the same day Dan informed me he no longer wanted to be a business owner.
Still, I adore writing books. I love it so much, and it's something I've always been keen on... I simply haven't prioritized it. Until now.
I decided that if there was going to be such a drastic change in my life and business by no longer having a business partner (and by dissolving the corporation we'd built together), then why not take the opportunity to finally prioritize book-writing!
Okay... so why write romance novels, of all things?
Waaaay back in the day, I wrote mysteries and fantasy novels. A few years back, I started a couple dystopian novels. And all of those were a lot of fun! I never published any of them, but I liked doing it as a hobby for myself.
For many years now, I've been fascinated by romance novels and have been reading more and more of them. Since I also started doing burlesque dancing a year ago and shortly thereafter realized that I identify as polyamorous (and earlier this year, Mr. Science and I officially switched from monogamy to polyamory), I've been that much more interested in the genre.
What I found most frustrating, when searching for romance novels that appealed to me, was that there weren't many in the specific genre of polyamory. The closest thing to it was people cheating (which isn't exactly ethical and therefore doesn't qualify as polyamory), or menage a trois style. My primary interest is in the "v-style" polyamorous relationships, in which both people in a couple have separate romantic relationships outside of their relationship.
I figured that if I couldn't find any books that had the type of material I wanted to read... then why not write those books myself?
It seemed like the perfect time to make it a major priority and focus heavily on it when my business partner broke up with me!
So that's how I got started with writing romance novels. I've mapped out close to 20 different book ideas (including nine in the Polyamorous Passions series); the first has already been published and the next will be published in October 2018. I'm looking forward to writing many more romance novels, and I also have plans to write a few more business books—although that's not what this blog post is about 😉
All right, now that we've got all of that out of the way, let's get to the meat of this article...
My romance novel writing process:
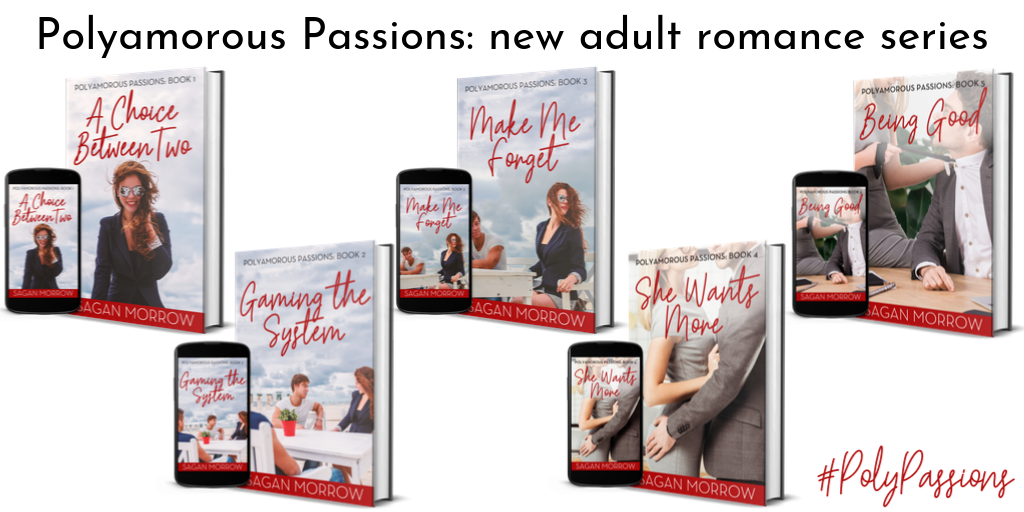
My romance novels are part of a series, Polyamorous Passions. The series will include nine books and follow the same cast of characters: each trilogy within the series will focus on a different main character (so, basically, the series follows the stories of three best friends as they each discover ethical non-monogamy).
Keeping in mind that the books are a series, my writing process has a few extra steps compared to if I were writing a stand-alone book. Plus, my books are really novellas more than novels: they're under 30,000 words each. If I were writing full-length novels, my process might look just a little bit different (particularly in that it would simply take me a whole lot longer to write them!). That being said, you can apply this writing process to a book of just about any length and any genre.
Here's what my romance novel writing process looks like...
Step 1: Write a blurb about each book in the series.
At this stage, back in July, I didn't even have character names or book titles yet. It was just a few sentences about what the book would be about, introducing the key players and laying out the big obstacles/issues that the main character would face.
This blurb serves as an early rough draft of what the book's synopsis (AKA the back-of-the-book blurb, or the description on Kobo or other e-reading platforms) will look like. If you don't have character names yet, just use X, Y, and Z as placeholders, for example.
Step 2: Create character profiles.
Again, you don't need to necessarily have character names yet. This is just about figuring out who your characters are. I decided to make it easier by mapping out the "basics" and included bullet points for each: career, hobbies, greatest strength, and greatest weakness. All the character profiles are currently in one Google doc.
After I started writing the first book in the romance series and got to know my characters better, I added in a few other bullet points for each character: age, physical appearance, living situation, and additional notes (e.g. that one character has allergies or another character enjoys a particular style of music, etc.). Doing this is a wonderful way to keep track of little bits and pieces so you don't accidentally forget about something important in a later book.
Step 3: Plan out your chapter outlines.
I did this one book at a time. I'm writing the series one book at a time, and so even though I know roughly what happens in each book (because those blurbs were already written in Step 1), I don't know exactly what all the little details will be yet. That's okay! Trying to write chapter outlines for all nine books at the same time would be rather daunting. Plus, you never know when characters will reveal new things about themselves as you're writing, so to already have detailed plans for Book 8 when you're in the middle of Book 2 could make things frustrating and confusing, if/when things change. 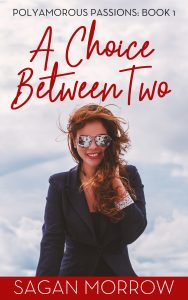
When I wrote Book 1 in Polyamorous Passions, A Choice Between Two, I used a simple spreadsheet that had one note per chapter. They said things like "X meets B" and "X hangs out with friends; doesn't tell them about B." The benefit of this style is that it gave me plenty of opportunity to play around with things once I got to writing the chapters. The drawback was that sometimes I'd be stuck for how to flesh things out and expand on that chapter.
With that in mind, for Book 2 (Gaming the System), I did things a little differently. This time, knowing that I'd probably have nine chapters again (as with Book 1), I divided each chapter into three bullet points. I then wrote in a different event/scene that happens for each of those three bullet points within each chapter. This way, I know ahead of time that I have at minimum three things to write about for each chapter and what those three things will look like. This is helpful for making the writing process that much easier and more fluid.
Step 4: Set word count goals.
One of the biggest mistakes I see business owners and writers make is that they create grand plans for themselves, without setting concrete, practical goals that they can stick with.
As a result, unfortunately they don't end up making much progress at all—if any.
(Psst... here are some tips on how to create a strategic plan of action for yourself.)
I combat this in my romance novel writing process by setting word count goals. I've created a spreadsheet with several columns: date, word count at start of day, word count at end of day, words written today, word count goal for the day, and word count goal to date. I've used formulas in the spreadsheet so it automatically calculates things for me. This way, I can see what my word count goal is for a specific day (generally 500, 1000, or 1500, depending on what I have going on that day or if I think I'll need a break from writing etc.), and make a point to try to meet or exceed that goal.
For my romance novellas, I have a "goal" of 21,000 words written for each book. If I go over that goal, then that's great! In fact, I expect I'll exceed that goal for every one of my books. But 21,000 words is kind of the minimum that I want for any of my books. If I write approximately 1,000 words/day on most days, then that means I can theoretically complete the entire first draft of a novella in about three weeks.
Step 5: Create a timeline for yourself.
Okay, so let's say you can write a novella in less than a month. Awesome! But... keep in mind all the other things you'll need to do with your book. Things like...
- Getting a book cover designed
- Rewriting and editing the book yourself
- Getting beta readers and editors to review your book
- Uploading your book to whatever site you're using (I love Kobo Writing Life and Draft2Digital)
- Submitting your book to reviewers and doing the marketing and/or a book launch for it
- ...etc.
Those are all important steps! Once you know what your word count goals look like and when you'll have a completed first draft by, then you can create a timeline to include all of the above steps. Take into account your personal situation: do you have other work commitments or life events coming up that might need to be prioritized? That's okay! You can give yourself a little bit longer if needed.
For me, I'm aiming to publish a new book in my series every two months. That (should) give me enough time to write, edit, and market my book before it gets released to the public, without getting in the way of other things I need to do in my business and life.
Step 6: Start writing.
I bet you thought we were never going to get to this stage! 
The reason why we do all of the other steps first is that they really do set the stage for making your writing that much smoother, more enjoyable, and timely. The other steps in this writing process are necessary for setting you up for success so that you actually finish your novel.
Honestly, starting with Chapter 1 and a blank page can feel super daunting. So I suggest not starting there at all. Instead, look at your chapter outline. What scene interests you the most? You probably have ideas of some dialogue or a character's inner monologue or a description of a scene in your head, so start with that.
Once you've written a few scene fragments/snippets like that, your head will be in a better place and you can then go back to Chapter 1 and start writing more linearly.
The reason why I prefer to write in as linear a fashion as possible is that it makes it easier for you to keep track of where characters are at, where they are going, what moods they're in, etc. It provides more continuity to your novel. If you do too much jumping around of writing different scenes, then you're probably going to have some gaps to fill (you'll accidentally write that a character is at Place A when they should be at Place B, or you'll mix up some chronology, or there will be some other kind of discrepancy. Trust me, I had to go back and change things because I jumped around too many times when writing the first draft of A Choice Between Two!).
Ultimately, how you choose to write is a very personal decision. This is what works for me. I encourage you to play with things and figure out what feels good for you! Give this writing process a try and see if it feels good to you, or if you want to start more linear right at the beginning, or if you want to write a bunch of little scenes first and then piece them together at the end like a jigsaw puzzle. You do you!
Step 7: Make notes as you go along.
As you're writing, you'll discover new things about your characters and you might create new characters. You might also create places like coffee shops that they spend their time at. When you're done writing for that day, go back and make notes of everything you added in that's useful information.
For example, I have a Google doc that outlines fictional coffee shops, bands, etc. that my characters discuss. This helps me to remember them and refer back to them in future books.
Step 8: Reread what you wrote when you're stuck.
I like doing this quite often, which is why my earlier chapters are probably always going to be a little stronger than my later chapters (since I write more linearly). When your creative brain needs a bit of a break, go back and read what you've written so far. You might catch typos and grammatical errors, or come up with new ideas to flesh out a particular scene, or learn something new about your characters that you didn't expect.
Step 9: Keep writing. Keep going.
It's okay to take a break from your writing from time to time, but try to write pretty much every single day—even if it's only a couple hundred words!—until you have a complete first draft. This will make you that much more likely to stay on track, meet your word count goals, and actually end up publishing your book. 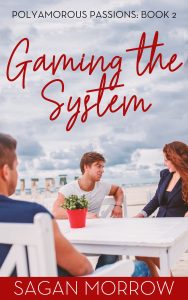
When I'm just trying to slog through my writing, I find a few things help me to make it happen...
- Turn up the music to something that amps you up and that you love.
- Get your favourite beverage in hand (coffee, tea, Vesper martini, etc.).
- Turn off all other distractions as much as possible.
- Switch locations (coffee shops and wine bars are great for this!).
- Ask a fellow writer friend to join you for a writing party (just hang out and write together).
- Remember that it's okay to just do it for yourself and have fun with it—it doesn't need to be perfect, and you don't have to publish every single word that you write. You can always edit later!
Step 10: Read through the entire complete draft.
So you've written your entire first rough draft. Woohoo! Now it's time to read through the entire thing. The idea here is that you want to make sure you didn't leave out anything important, or have major inconsistencies, and so on. If you happen to catch a typo, that's great! But that's not really what this stage is about. Instead, try to focus more on the story as a whole (and if you discover that you forgot to write half a scene, then be sure to do that now. Yes, I've been there, done that!).
Once you've read through the entire book and done some rewrites and edits in there, this would be a good time to pass off your novel to someone else to read. These could be beta readers that you find online or a couple of trusted friends who can provide you with feedback. You might want them to make suggestions based on character likability/development, plot, grammar, story flow, etc.
Just make sure that you're clear about what you do and don't want, and be prepared for constructive criticism! Our loved ones are always going to be kinder to us, so if you can give the book to someone who isn't going to worry about hurting your feelings (and who you won't take it personally from), that's going to help you get constructive feedback.
Step 11: Print out and read through the entire book.
I love this step because you can catch so many more things on paper than on the computer. Plus, it's easy to flip back and forth from one page to the next. Use brightly coloured pens/highlighters when you're going through it, and/or have your computer open so you can make changes immediately.
I also suggest you open a new document to keep a running list of questions/comments for your future self (such as consistency for different spellings of different words, if you're unsure if something fits the style guide you're using, if you're concerned you used a particular word/punctuation mark too many times, etc.).
Step 12: Do a final read-through of your book (ideally out loud).
As with printing out the book to edit it, reading it out loud will help you to notice things you otherwise wouldn't see if you're reading it silently or on the computer. You might notice that you have the same cadence to a bunch of sentences in a row, or that you overuse one word or another, and so on.
At this stage, you'll likely also want to send the book to an editor. There are so many different types of editing that can be done at each stage of the process! At the very least, someone to do a final proofread of the book can be useful for catching any embarrassing errors before it gets published.
You'll notice that you have now written, rewritten, read, and edited your book several times. After the entire first draft is complete (during which time you'll have already reread and rewritten various pieces), I recommend doing a minimum of three complete rereads (with edits) on your own. Each time you'll catch something new.
Important note...
As with anything in your life and business, make sure you're enjoying yourself!
Part of why I wanted to start writing romance novellas was to make it the primary focus of my business (AKA, earn a decent income from it). And an equally important part of why I'm doing it is that I love it. I have so much fun with it. I enjoy getting to know my characters and building a world and sharing my thoughts and ideas.
Be very clear with yourself about your reasoning for writing romance novels. What about it appeals to you? How much feedback from other people do you want? In the early stages, you might decide you just want a proofreader to do a final edit for your books; as you move forward with your book-writing career, you might want to have developmental editors and beta readers to provide feedback and direction on the plot and characters.
It's really up to you how much input you want from other people. Your books will absolutely benefit from getting early readers and editors to review it for you! At the same time, if you just want to write and publish the books for your own enjoyment without paying much attention to other people's opinions, that's cool too. Once again, you do you.
What's next?
After you go through this entire romance novel writing process, you'll need to publish and promote your book! That's a topic I'm still exploring myself and will share the results of my experiments in a future blog post 🙂
For now, focus on creating actionable, realistic plans for your writing process. Make sure you write every day. Rewrite and edit on a continual basis. Enjoy yourself. And keep at it, because if you're serious about being a fiction author, then it's up to YOU to make that happen!
Pssst... you can see the end result of my romance novel writing process when you read my books.
And, you can get more tips on how to write a novel in the Indie Author Weekly podcast—features quick, actionable episodes that are all under 20 minutes and include step-by-step tips to make your author life that much easier!
Share in the comments: do you love writing? What does your writing process look like?
